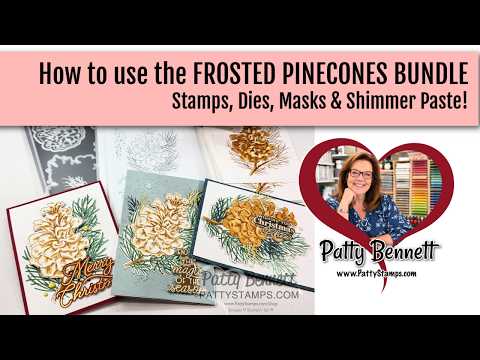
Thank you for joining me yesterday on my YouTube channel to see 3 ways I used the Frosted Pinecones bundle to make beautiful winter theme cards! Today I am sharing the cards I created using Shimmer Paste to add a beautiful wintery feel to the pinecones. ...
‌ ‌ ‌ ‌ ‌ ‌ ‌ ‌ ‌ ‌ ‌ ‌ ‌ ‌ ‌ ‌ ‌ ‌ ‌ ‌ ‌ ‌ ‌ ‌ ‌ ‌ ‌ ‌ ‌ ‌ ‌ ‌ ‌ ‌ ‌ ‌ ‌ ‌ ‌ ‌ ‌ ‌ ‌ ‌ ‌ ‌ ‌ ‌ ‌ ‌ ‌ ‌ ‌ ‌ ‌ ‌ ‌ ‌ ‌ ‌ ‌ ‌ ‌ ‌ ‌ ‌ ‌ ‌ ‌ ‌ ‌ ‌ ‌ ‌ ‌ ‌ ‌ ‌ ‌ ‌ ‌ ‌ ‌ ‌ ‌ ‌ ‌ ‌ ‌ ‌ ‌ ‌ ‌ ‌ ‌ ‌ ‌ ‌ ‌ ‌ ‌ ‌ ‌ ‌ ‌ ‌ ‌ ‌ ‌ ‌ ‌ ‌ ‌ ‌ ‌ ‌ ‌ ‌ ‌ ‌ ‌ ‌ ‌ ‌ ‌ ‌ ‌ ‌ ‌ ‌ ‌ ‌ ‌ ‌ ‌ ‌ ‌ ‌ ‌ ‌ ‌ ‌ ‌ ‌ ‌ ‌ ‌ ‌ ‌ ‌ ‌ ‌ ‌ ‌ ‌ ‌ ‌ ‌ ‌ ‌ ‌ ‌ ‌ ‌ ‌ ‌ ‌ ‌ ‌ ‌ ‌ ‌ ‌ ‌ ‌ ‌ ‌ ‌ ‌ ‌ ‌ ‌ ‌ ‌ ‌ ‌ ‌ ‌ ‌ ‌ ‌ ‌ ‌ ‌ ‌ ‌ ‌ ‌ ‌ ‌ ‌ ‌ ‌ ‌ ‌ ‌ ‌ ‌ ‌ ‌ ‌ ‌ ‌ ‌ ‌ ‌ ‌ ‌ ‌ ‌ ‌ ‌ ‌ ‌ ‌ ‌ ‌ ‌ ‌ ‌ ‌ ‌ ‌ ‌ ‌ ‌ ‌ ‌ ‌ ‌ ‌ ‌ ‌ ‌ ‌ ‌ ‌ ‌ ‌ ‌ ‌ ‌ ‌ ‌ ‌ ‌ ‌ ‌ ‌ ‌ 

Patty Stamps

Frosted Pinecones with Shimmer Paste!

A handmade Christmas card features a large, die-cut pinecone layered over green pine needles. The words “Merry Christmas” are written in gold, glittery script at the bottom right. The card is set against a deep maroon border, accented with small, metallic gold embellishments. To read more, visit Patty Stamps (pattystamps.com)

Thank you for joining me yesterday on my YouTube channel to see 3 ways I used the Frosted Pinecones bundle to make beautiful winter theme cards! Today I am sharing the cards I created using Shimmer Paste to add a beautiful wintery feel to the pinecones.

A person’s hand holds a die-cut paper pinecone with gold shimmer paste on a craft mat. Next to it lies a pine branch stencil with black paste residues, and text overlaid on the image reads, “SHIMMER PASTE ADDS A BEAUTIFUL TOUCH!” To read more, visit Patty Stamps (pattystamps.com)

The shimmer paste adds a perfect touch! I found it best to use mask #5 for the shimmer paste. Be sure to watch the video for all the ink blending tips and shimmer paste application details.

A piece of white cardstock featuring a raised, golden-brown pinecone design sits on a black mat next to a stencil. Beside them are a container of shimmer paste, a palette knife, and ink pads on a white grid surface. To read more, visit Patty Stamps (pattystamps.com)

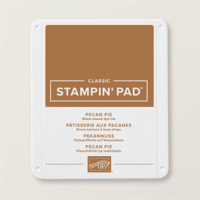
My ink blending color combo for the pinecones with shimmer paste:

A stamped image of a pinecone on white cardstock is layered over a yellow note card. The text above lists the ink and paste colors used: Pecan Pie, Golden Glow, and Shimmer Paste. A watermark with the name Patty Bennett and her website URL is visible on the left. To read more, visit Patty Stamps (pattystamps.com)

Check back tomorrow for more ink blending color combos from the video and for another card idea!

A completed “Merry Christmas” card featuring a pinecone image sits next to several plastic stencils and white sample cards. Yellow sticky notes attached to the stencils detail specific stamp color combinations for the pinecone design. To read more, visit Patty Stamps (pattystamps.com)

I loved sharing so many tips during our weekly live video, and I hope you enjoyed learning something about the Frosted Pinecones bundle! Did you enjoy the “frosted” idea featuring the Shimmer Paste? I’m including the replay below on this blog post!

A handcrafted card features a large, glittery pinecone at the center, surrounded by pine branches in green, gold, and dark blue. The background is a soft blue cardstock embossed with a snowflake pattern, and a gold die-cut sentiment reads, “Enjoy the magic of the season.” To read more, visit Patty Stamps (pattystamps.com)

This pinecone card is actually a 4×6 size, no particular reason other than I had embossed a 6×6 piece of two tone cardstock with the Dreamy Snowflakes embossing folder. (Don’t worry about the 4×6 envelopes, grab some here).

I used the left over snowflake embossed strip inside the card to create a gift card holder pocket.

A handmade card features a light blue pocket embossed with white snowflakes, holding a smaller square tag decorated with gold and blue starburst designs. Above the pocket, the text “SEASON FILL YOUR heart” is printed on the white card base. To read more, visit Patty Stamps (pattystamps.com)

Be sure to watch the video for all the details (replay below), and for those who love a good visual, here is my process for stamping the pinecone stamp in Pecan Pie and Peaceful Pine and combining them after coloring them with blending brushes and ink. I cut out the pecan pie cone image and layered it over the Peaceful Pine image, then used the die to cut the whole image out.

A hand holds a finished card featuring a die-cut, golden-brown pinecone layered over green pine needles. On the table nearby, a partially colored pinecone stamp and a black silhouette cutout show the layering process, accompanied by text overlay instructions on crafting. To read more, visit Patty Stamps (pattystamps.com)

Be sure to check out the option to add additional pine needle sprigs between the 2 layers for additional dimension.

A die-cut craft project on a black mat shows a large, golden-yellow pinecone layered over green pine needles. Three individual die-cut sprigs in dark teal and gold rest to the side. A white text box at the top provides instructions for layering the die-cut pieces. To read more, visit Patty Stamps (pattystamps.com)

Frosted Pinecones Video Tutorial Replay


Shop Frosted Pinecones card supplies

A Stampin’ Up! crafting set titled “Frosted Pinecones Bundle” displays pinecones and pine branch stamps, coordinating die cuts, and sentiments like “Sending warmth & light,” “Thinking of you,” and “May the beauty of the season fill your heart.”. To read more, visit Patty Stamps (pattystamps.com)

Want to leave a comment? Please CLICK HERE.

Shop paper crafting products online with Patty Bennett at www.MyStampOrder.com

Shop Online Anytime and Earn FREE STAMPS

SHOP and SAVE: Last Chance List

Join my Luv 2 Stamp Team of demonstrators – click for info

All my Favorites on Amazon - as an Amazon Associate I earn from qualifying purchases. 

Sign Up for my Customer  Newsletter

MY FREE VIDEOS tutorials