Hey crafty friends! The fall season is upon us, whether the weather feels like it where you live or not. (I live in the OR NOT region. Sigh.) Today's cards are seasonally perfect for fall, and yet depending on the colors you choose, they are seasonally perfect ALL year long, which means they are versatile and a worthy investment in your crafty stash. Gotta love that, right?
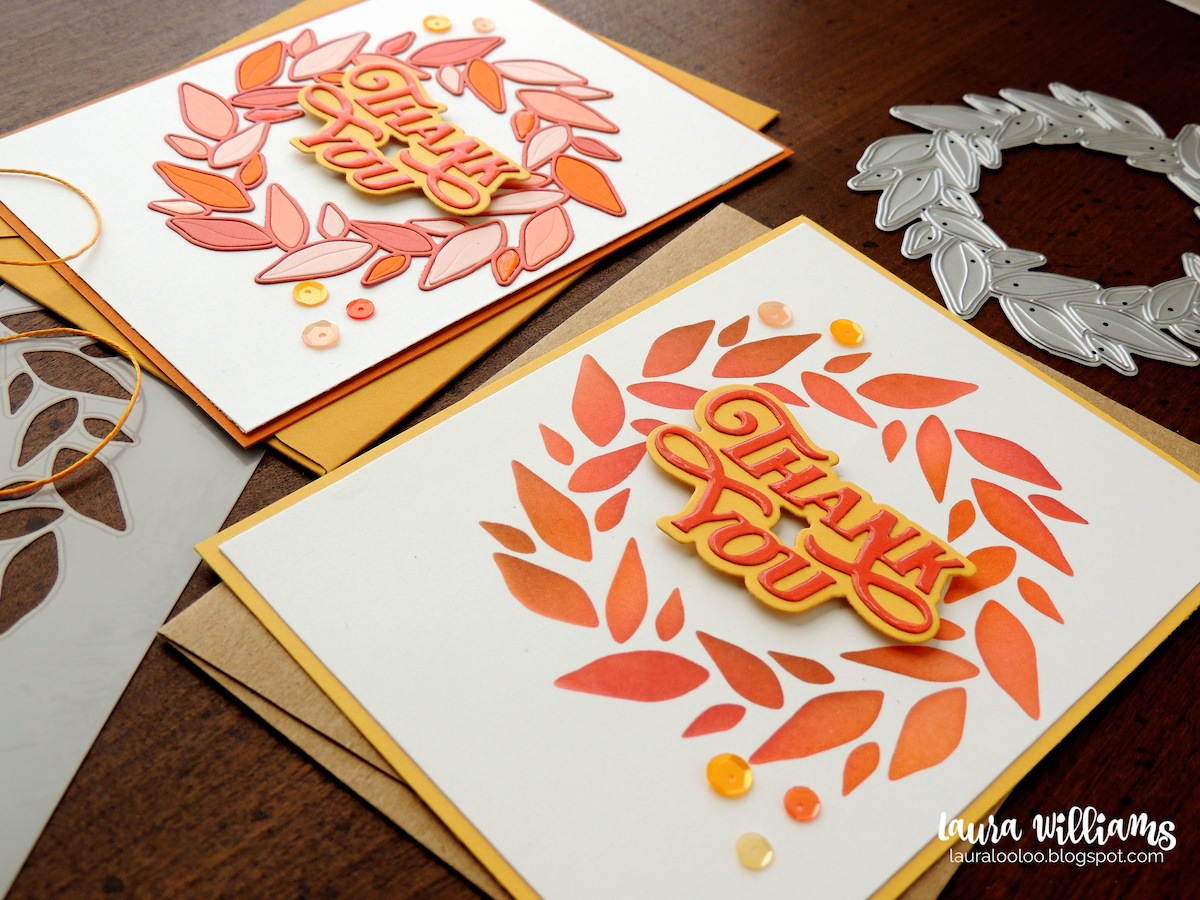
This blog post contains affiliate links. When you shop through my links, I receive compensation at no cost to you. Thank you from the bottom of my crafty heart! I've created two similar cards but they're created in different ways, so whether you're a die-hard die-cutter or a stenciling sweetie, there's an option for you. Both cards showcase the new Leafy Wreath stencil and Detail Leafy Wreath die, which can be used together or separately in a lot of super cute ways. Both products are brand new from Simon Says Stamp's latest collection, called Sending Cheer. Let me show you what I did...First up, is the stencil version. This is a simple single layer stencil that is quick and easy to use. I chose a variety of autumn-friendly peach and orange shades and blended the colors together over the wreath. Other ideas for this stencil: 1.) Change up the colors (leafy greens, springy pastels etc.) 2.) Add some die-cut shapes (hearts, berries, stars etc.) to give it a stronger holiday or special occasion theme 3.) Spread a paste over the stencil for a textural wreath.  Next, is the second version of this card, featuring die-cutting. This die creates the outline shape as well as the leaves. I die-cut it from a similar variety of fall colors and pieced it together. The beauty of this idea is that you're left with quite a few pieces to make multiple cards by mixing and matching the colors. To complete both cards, I used the Showboat Thank You die with some dimensional glaze on the sentiment, and then a scattering of sequins. Remember another option would be to sort of combine these two card ideas - by stenciling the wreath and then adding the die-cut outline over the top. Lots of fun ways to combine these two products!
Don't miss out on any of the Sending Cheer fun: Shop the Supplies on Today's Cards: Showboat Thank You I absolutely love these large blending brushes. They are super soft and apply ink to cardstock smoothly! the BEST glue for adhering tiny pieces, and it lasts a super long time! If you loved today's ideas, check out this post where I created a similar set of "same card two ways" using a winter snowflake. Stop by this blog post to check it out!
Hey there party people! Ready to cue the confetti? It's STAMPtember at Simon Says Stamp, which means: crafty friends, crafty inspiration, crafty giveaways, crafty videos and tutorials, crafty collaborations, crafty new products and one heck of a CRAFTY PARTY! I'm so pleased to be part of today's epic STAMPtember blog party, in which you will find not only darling cards and crafting ideas but GOODIES too. In fact, you'll find a great little freebie at the end of this blog post so stick with me, party peeps! But first, onward to today's cards. This blog post contains affiliate links. When you shop through my links, I receive compensation at no cost to you. Thank you from the bottom of my crafty heart!
In honor of YOU, my crafty friends, I created this card for today because crafty friends ARE the best friends! These adorable little critters are the perfect way to kick off our crafty month. I kept them clean and simple as proof that even if you aren't a colorer, you can still make super cute cards with stamps that at first glance might "need to be colored."  In the background of both of today's cards, I used the new Notched A7 Rectangles dies as a stencil to ink a simple but colorful background. It gives my crafty critters a place to land, and adds a pop of color and personality.
To make a stencil with your dies: simply die-cut a shape, (in this case the Notched Rectangles,) from scrap cardstock. Leave enough border on all sides of the cut shape, because you'll use the negative space to blend ink into, and you don't want to go over the outer edge of cardstock. This is a fun way to get new life out of your stash of dies, and it's a great technique when you want to create thin or one layer cards. What shape dies do you have that would look awesome blended in ink? Try it today! There's so much to celebrate during STAMPtember at Simon Says Stamp, and I have a little gift for you to kick off the month! This adorable Groovy Happy Birthday dies is free with any purchase - follow the steps in the graphic below to claim your die set. (This set would look great paired with the die-cut stencil idea I just shared with you too!) Be sure to stop by the Simon blog today to find the MEGA list of party participants (and see the crafty inspirations plus gifts they have to share!) and then stay tuned all month long so you don't miss a minute of STAMPtember fun! Thanks so much for coming by today! Happy STAMPtember! xoxo Shop the Supplies on Today's Cards I absolutely love these large blending brushes. They are super soft and apply ink to cardstock smoothly!
Before you go, don't miss yesterday's blog post!
Oh, crafty friend! It's TIME. The most wonderful time of the year . . . it's STAMPtember at Simon Says Stamp! An entire month of exclusive products, brand collaborations, giveaways, and fantastic inspiration. Basically, are you ready to put on your crafty pants and PARTY ALL MONTH LONG? Great! Me too! Today I'm kicking off STAMPtember 2026 with two winter cards made with brand new product from this month's release - the Stained Glass Snowflake stencil, and Stained Glass Snowflake die. These two products work seamlessly together or individually, so whether you grab one or both as a bundle, you're guaranteed to have some winter crafting fun. Let's take a look at today's cards and I'll show you just how fun these new Simon goodies are! This blog post contains affiliate links. When you shop through my links, I receive compensation at no cost to you. Thank you from the bottom of my crafty heart!
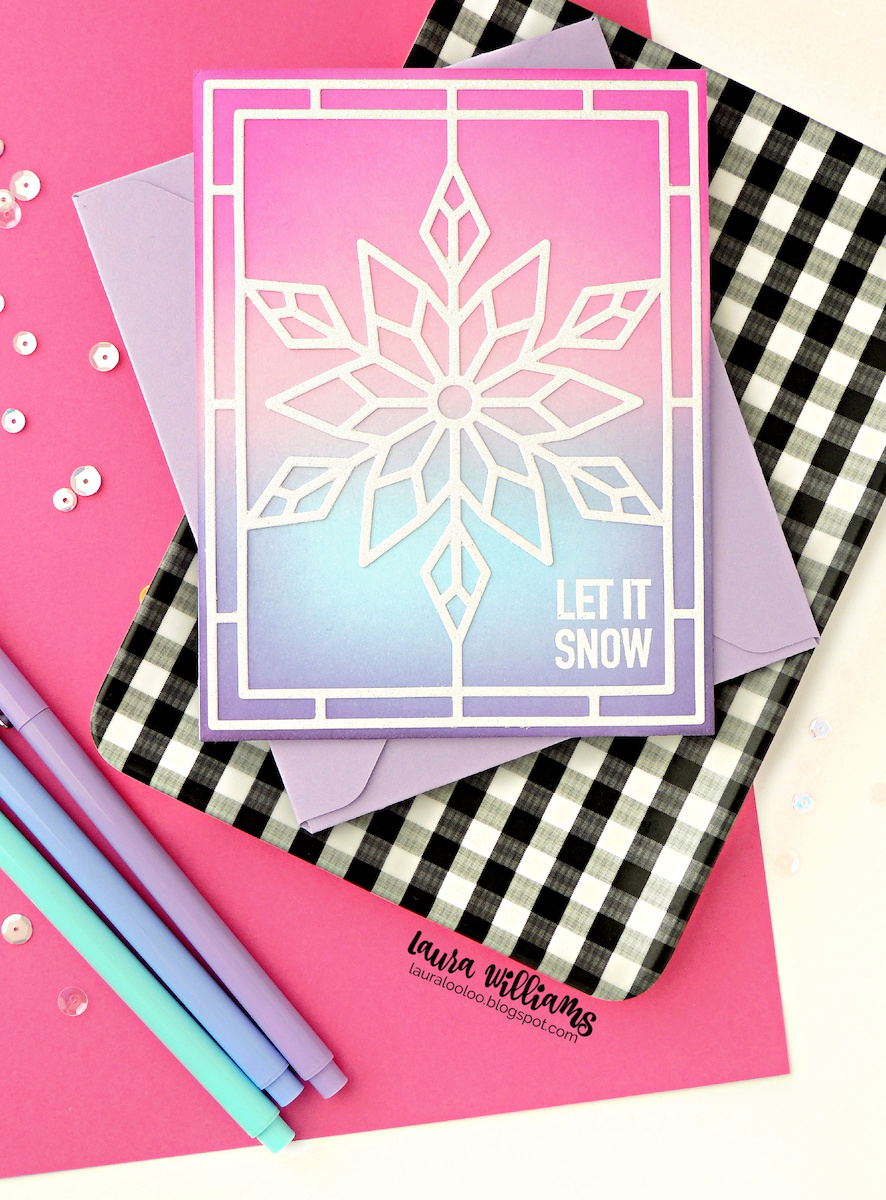
I created two cards for you today, they're both similar in layout, but I used the die for one and the stencil for the other. Looking at both cards, you'll easily see how fabulous they'll pair TOGETHER on your creations as well! First up, the die-cut card. I cut the Stained Glass Snowflake from glitter paper (which is always annoyingly hard to see in photos!) The die-cut panel was adhered on top of an ink blended card base which I think turned out so pretty in pinks and blues. To finish off this super simple card, I added a sentiment from last year's Plaque Slides Christmas stamp set.  Next up, this card has same layout but it's done in a totally different way. I used only the stencils to create the same image. This stencil set includes four layers, and I stuck to the same color palette as my first card. The stencil will allow you to color the border, the assorted sections on the snowflake, and also the background. The geometric shapes and border make it really simple to line up each stencil too. Both of these cards would be great for mailing because the are flat cards and easy to mass produce.
Okay you guys, there's so much to see and do this STAMPtember so don't miss out on any of the fun: Don't be a stranger this month, because Simon Says Stamp has so much fun planned for us all! Thanks so much for stopping by today! Don't forget to come back tomorrow for our epic STAMPtember blog party! I I have more cute cards and goodies to share with you!
Shop the Supplies on Today's Cards I absolutely love these large blending brushes. They are super soft and apply ink to cardstock really smoothly!
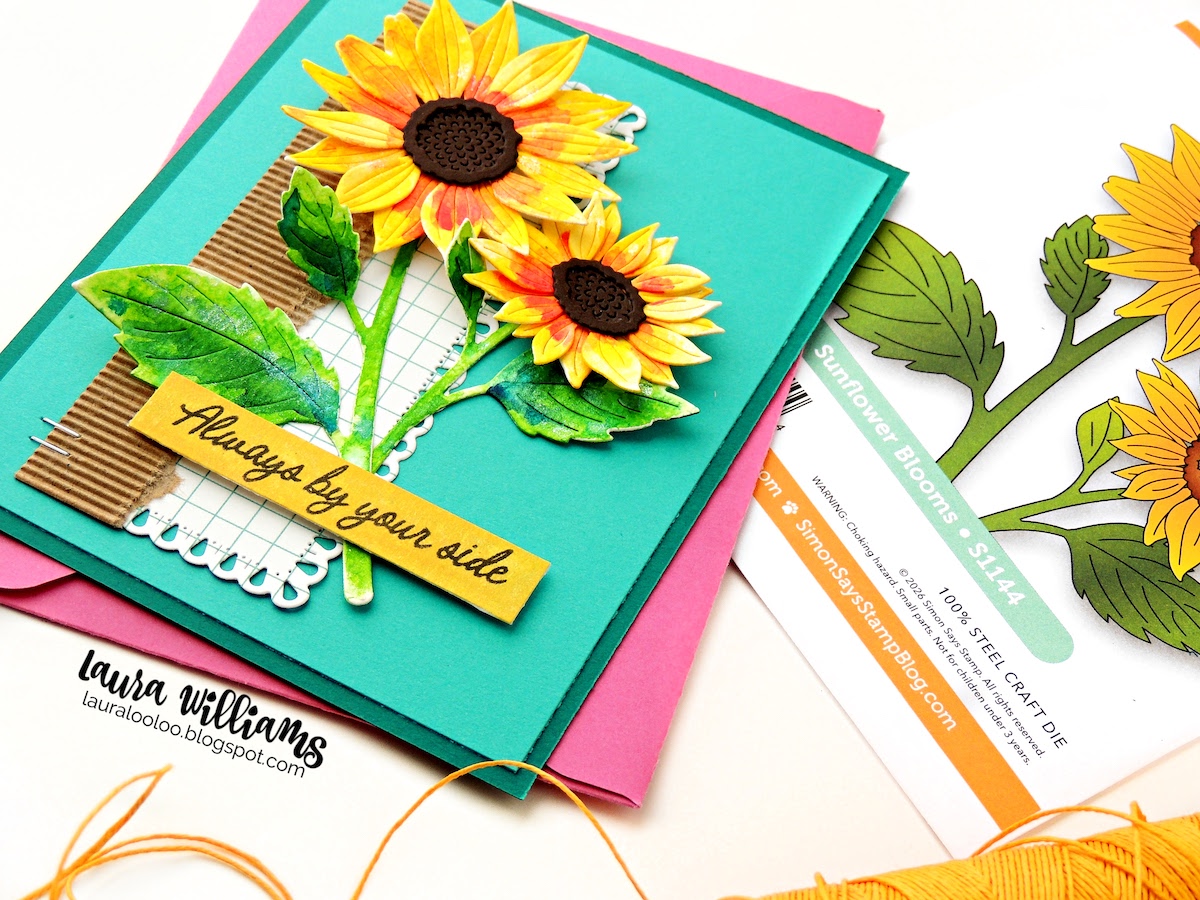
Friends, the Every Happiness release from Simon Says Stamp is available NOW and it is loaded with the sweetest products! Sunflowers are one of my very favorite things in the world, so I was thrilled to play with the Sunflower Blooms dies, along with a variety of other darling products, brand new from Simon! We're celebrating this new release with a two-day blog hop, and today is DAY 1 - so let's get this party started! This blog post contains affiliate links. When you shop through my links, I receive compensation at no cost to you. Thank you from the bottom of my crafty heart! To add some texture to my card, I used a scrap of corrugated cardstock layered with a piece of grid paper. I die-cut it with another new goodie from this release - it's the Petal Point Frames nesting dies. This will be such a faithful go-to set of rectangle dies in your stash.
Thanks so much for stopping by for day one of Simon Says Stamp's two-day blog hop - don't forget to check out Day 2 tomorrow, starting on the Simon blog. One lucky commenter from each stop during the two-day hop will win a $25 coupon to SSS, so be sure to leave comments along the way. (Winners will be announced on the Simon blog.)Don't miss out on all the fun:- Stop by the Simon Says Stamp website to see the entire Every Happiness release
- Check out the Every Happiness gallery , packed with cute inspiration - and please add your own projects as you create with this release. We would love to see what you make!
- Join the SSS YouTube Live Stream at noon EST on Tuesday, July 28! Click HERE to be notified when they’re live.
Don't Miss a Stop on the Hop!
Shop the Supplies on Today's Project (I used a sentiment for today's card)
If you're a fan of coastal themes, layered die cuts, and pretty seashells, I think you're going to LOVE today's projects. I have two cards to share that capture all those seaside vibes, with simple die-cutting and sweet stamped sentiments.
This blog post contains affiliate links. When you shop through my links, I receive compensation at no cost to you. Thank you from the bottom of my crafty heart!
Beach Bird's-Eye creates the amazing shoreline background that you see on both cards. I used it traditionally on the horizontal card, as it creates a beautiful sand to water transition. On the Hello, Friend card I picked just a few of the layers, cut from white cardstock, to create a more subtle ocean wave background. Now, let's talk about these seashells! Simon Says Stamp nails it every time when it comes to simple layered dies. I say it over and over, but I absolutely love the sweet spot in die-cutting with a perfect balance between interesting, layered dies that don't have a hundred little pieces or take an hour to assemble. The Beachcomber Seashells set have just two pieces per shell. They fit together quickly and seamlessly, and it only took a few minutes to cut and assemble all of these shells. I chose a tone-on-tone look for each shell, but dang, there are limitless combinations you can create with these simple beauties. If you love seashells, I absolutely recommend this sweet summer die set.
I hope you'll stop over at Simon Says Stamp and check out the entire Shine On collection. It includes much more than just summer themed products, so if seashells aren't your style . . .I bet something else in this collection IS! Thanks for coming by today! xoxo
Shop the Supplies on Today's Cards: (I used the Hello, Friend sentiment) (I used the You are my sunshine sentiment)
Did you love today's card? You might love this too!
|